You are here: Benchmark Home » jack-o-lantern

Tag: jack-o-lantern

Jack O’Lanterns: A Brief History

The term “jack-o’-lantern” was first applied to people, not pumpkins. As far back as 1663, the term meant a man with a lantern, or a night watchman. Just a decade or so later, it began to be used to refer to the mysterious lights sometimes seen at night over bogs, swamps, and marshes.

The term originates as early as 1663, but no-one using it at the time had likely ever seen an orange pumpkin. Just like the term “jack of all trades” implies, a “jack-o’-lantern” was a man who carried the lantern to keep watch at night. Not too many years later, the term was used in jest to add lightheartedness when describing mysterious lights seen over wetlands at night. People used to tell stories to explain these lights, and as early as the 1500’s, the Irish stories often involved a character named Jack.


The Legend(s) of Stingy Jack

The stories portrayed Stingy Jack as a blacksmith who invited the devil to a drink. Jack, being stingy, concocted a strategy to relieve himself of the responsibility to pay for the drinks and convinced the devil to transform himself into a coin which could be used to pay the tab. The devil now in the palm of his hand, Stingy Jack walked out on the tab and placed the coin into his pocket with a silver cross to prevent the devil from transforming back. Bargaining with the devil to not take revenge on Jack or claim his soul upon his deathbed, he released the devil from his pocket-sized prison.

Another tale tells of Stingy Jack outwitting the devil once again, when he connivingly talked him into climbing a tree to pick fruit. During the devil’s venture into the canopy, Jack carved a cross into the trunk to prevent the devil from descending back again. Just as at the last, Jack bargains for his safety from revenge and possession of his soul before finally permitting the devil to climb down to stable ground from the tree’s branches.

At the last, Stingy Jack passed away, and his spirit found no rest. He was not allowed into heaven, and the devil honored his vows to deny ownership of Jack’s soul at hell’s gate, and gave him a glowing coal before sending him into the darkness of night to find a hell of his own. Upon receiving this burning ember, Jack placed it into a carved out turnip to roam the earth forevermore. The mystery lights of the Irish wetlands were attributed to Stingy Jack’s lantern’s motions as his wandering soul roamed the lands. The light and its supposed bearer were, together, called “Jack of the Lantern,” or “Jack O’Lantern.”


Stingy Jack Visits the New World

Back home in the British Isles, the tradition of making lanterns by carving turnips, beets, or potatoes occupied by coal, embers, or candles was part of celebrating the fall harvest. Children were known to venture off the road with their make-shift lantern to trick passersby into believing that Stingy Jack or another lost soul was near.

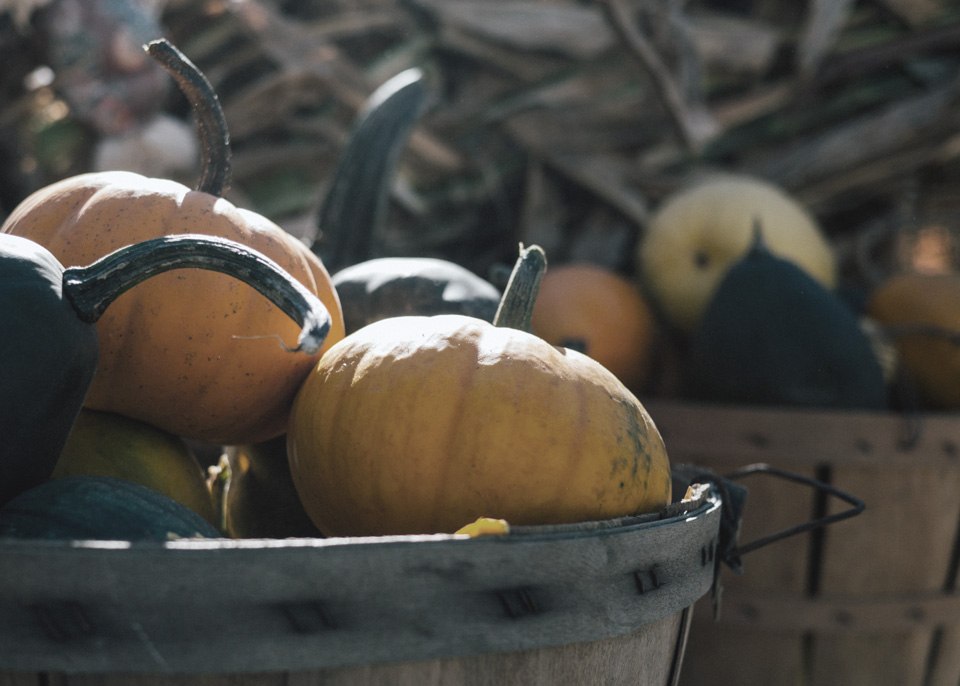
In the new world, pumpkins were key in the survival of early settlers. The following poem gives the example:

For pottage and puddings and custards and pies
Our pumpkins and parsnips are common supplies,
We have pumpkins at morning and pumpkins at noon,
If it were not for pumpkins we should be undoon.”

Pilgrim verse, circa 1633

The abundance of pumpkins made them the perfect choice for Irish immigrants to carve into Stingy Jack’s lanterns. These new vessels became part of the tradition.


From European Legend to Seasonal Decor

In time, children began carving crude faces into them to make them more frightful. The carved face and legend of Jack merged by the mid 1800’s when the carved glowing pumpkins were finally called jack-o’-lanterns.

In 1892, the Mayor of Atlanta included jack-o’-lanterns used as decorations for a Halloween party. Several pumpkins with carved faces and inner lights were placed around the premise, and entered into the American tradition of the modern jack-o’-lantern.

See our related articles:
Simple Pumpkin Carving for the Whole Family,
Easy and Free Pumpkin Carving Stencils, and
5 Easy Tips for Fall Decorations.


inspired by: http://mentalfloss.com/article/12865/whats-origin-jack-o-lanterns

Simple Pumpkin Carving for the Whole Family

I remember, as a child, watching people carve Halloween pumpkins. It was a struggle to cut out the small triangular features with an unwieldy kitchen knife. We didn’t always manage to get the teeth going in the right direction, and some of these jack-o’-lanterns were decidedly more successful than others.

Thankfully, there are now tool kits on the market created especially for carving pumpkins. With these tools to the rescue, carving pumpkins is easier than ever before and, therefore, the designs can be as amusing or enchanting as you wish to make them. You can mix and match pattern shapes or create some of your own — cookie cutters and coloring books are good sources for inspiration.

Although any actual cutting should be left for the adults, there are plenty of opportunities for children of all ages to participate. Going to the pumpkin patch to pick your own pumpkin is a great beginning.

1. Funny Face
For this Funny Face pumpkin cut two ear shapes (one from each side); then when you have completed the rest of the carving, put the tab inserts into the cutout holes and secure with straight pins. A little experience and a steady hand are required for the areas around the eyes. If in doubt, eliminate the teardrop shape directly under the eye to avoid carving the thinner strips. Pumpkins can be scooped out from the top or the bottom. Cut a lid or a bottom candle opening as desired.

2. Galaxy of Stars
Let the stars shine through, and a crescent moon as well, in this Galaxy of Stars design. Cut as many stars as fit your pumpkin and place the carved lantern on the doorstep or in a window to welcome trick-or-treaters.

3. Autumn Leaves
Falling leaves are the inspiration for this Autumn Leaves design. By scattering maple- and elm leaf-shaped patterns at angles, the result is a windblown look that is appropriate for the season.

4. Going Batty
Going Batty describes the cutout designs circling all around this carved creation. Two different sizes fly over the surface. As with Autumn Leaves and Galaxy of Stars, this pumpkin looks equally enchanting from all sides. When not on display, store your carved pumpkin in a refrigerator with plastic wrap covering all the carved areas.

What to Do

1. Choose a pumpkin that is an appropriate size and shape for the design you wish to carve. Tall pumpkins may lend themselves better to faces. For designs with lots of cutouts, look for large, round pumpkins with smooth surfaces. Look for a pumpkin with a flat bottom that will sit upright.

2. Wipe the pumpkin clean with a soft damp cloth and dry.

3. Decide which patterns you want to use, and trace the design — actual size or enlarged or reduced on a photocopier — onto tracing paper.

4. For a lid: Draw a 6-sided lid with a V-shaped notch at the back. This notch will serve as a guide to replace the lid. For a bottom: Draw an opening on the bottom of your pumpkin if you want to sit it over a candle. Be sure to draw the opening large enough so that it will be easy to reach inside and scoop out the contents when cut.

5. Only grownups should do the actual cutting. To do so, cut along the drawn lines for the lid or bottom opening with a sharp paring knife. Keep your non-carving hand away from the blade at all times. If cutting a lid, angle the blade toward the center of the pumpkin to create a ledge that supports the lid. If cutting a bottom, cut straight into the pumpkin.

6. Scoop out the seeds and strings from inside the pumpkin — a good step for kids. Use a large spoon or ice-cream scoop or the plastic scraper scoop that is made for this purpose.

7. Scrape the inner pulp away from the area of the pumpkin that you plan to carve until the pumpkin wall is approximately 1 inch thick. To check the thickness, insert a straight pin into the wall.

8. Tape the patterns to the pumpkin: It may be necessary to cut slashes in the edges of the paper for the patterns to fit smoothly in place.

9. To transfer the patterns to the pumpkin, use a pushpin, corsage pin or the tip of the poker tool to poke holes through the paper and into the pumpkin along the design lines about 1/16 inch to 1/8 inch apart. Make sure that all of the lines have been transferred. Remove paper, and use a pen or dull-point pencil to connect the dots. Save the paper patterns to refer to while carving.

10. Cradle the pumpkin in your lap, and keep the pumpkin saw or small paring knife at a 90-degree angle to the pumpkin while carving. Carve from dot to dot to cut out the pattern shapes; if using the saw, don’t try to slice with it, but saw with a gentle up-and-down motion, not back and forth. It is definitely easier to create smaller and rounded shapes with the saw that is made for this purpose. If an older child wants to help, the saw is much safer than a knife but still requires adult supervision. Do not exert too much pressure or the tools might break. Push the cut pieces into the pumpkin with your fingers. If a large piece becomes wedged, cut it into smaller pieces.

11. If you happen to cut through a pumpkin section by mistake, reattach the pieces with straight pins or toothpicks.

12. Rub all cut pumpkin edges with petroleum jelly to keep it fresh longer.

13. Insert a short column candle, votive or battery-operated light in the pumpkin. If the candle is not in a holder, form a holder from aluminum foil and secure the candle with a few drops of melted wax.

14. If candle smoke blackens the lid, cut a chimney hole in the lid top to vent the smoke and heat and preserve your design.

Post courtesy of RD.com

More pumpkin designs:

http://www.rd.com/images/content/101101/pumpkin_cutout_patterns.pdf

http://www.pumpkinmasters.com/free-patterns.html

http://www.spookmaster.com/pumpkin-carving-patterns-freebies.htm

http://www.pumpkinlady.com/pumpkin-carving-patterns/free-pumpkin-carving-patterns/